What IRQL_NOT_LESS_OR_EQUAL Actually Means
Stop code 0x0000000A fires when a kernel-mode driver or Windows itself tries to read or write paged memory while running at a raised interrupt request level (IRQL). Paged memory can be swapped out to disk at any moment, so the CPU cannot safely touch it above a certain IRQL threshold. When that rule is violated, Windows has no safe recovery path and halts immediately.
On a brand-new machine running Windows 11, this is one of the first BSODs we see come through the shop, and it is also one of the most frequently misread.
Microsoft’s kernel debugger documentation identifies two root causes: a bad pointer dereference or a pageability problem caused by kernel-mode code using an improper address. Both paths produce the same stop code, which is why the crash dump parameters matter more than the error name itself.
Reading the Two Diagnostic Branches
Parameter 1 in the minidump is the memory address that was accessed illegally. Two values tell you which branch you are on:
- Parameter 1 below 0x1000: almost certainly a NULL pointer dereference, meaning a driver passed an uninitialized or zeroed pointer into a kernel call.
- Parameter 1 in the paged pool range: the IRQL was too high to access that address, pointing to a driver that failed to lock memory before raising its interrupt level.
Minidump files land at C:WindowsMinidump and can be opened with WinDbg or NirSoft BlueScreenView to surface the offending module quickly.
Why RAM Is on the Suspect List
The instinct on a new build is to blame drivers, and drivers are a legitimate cause. But Microsoft’s own support guidance explicitly includes memory issues and hardware problems alongside faulty drivers in the fix path for IRQL_NOT_LESS_OR_EQUAL 0x0000000A memory fix Windows 11 scenarios.
A DIMM with a poor electrical contact produces corrupted reads that the kernel interprets as an invalid address access. The crash dump looks identical to a driver bug. That overlap is exactly why we always seat and test RAM before touching driver versions on any new build that arrives with this stop code.
Why a New PC Can BSOD Out of the Box
A brand-new system arriving with a BSOD feels like a defect, but the cause is almost never a failed component. In our experience, IRQL_NOT_LESS_OR_EQUAL on new PC first boot traces to one of three conditions: a DIMM that shifted in its slot during shipping, a driver stack that has not fully settled during the first Windows setup pass, or an XMP/EXPO memory profile that sits right at the edge of stability.
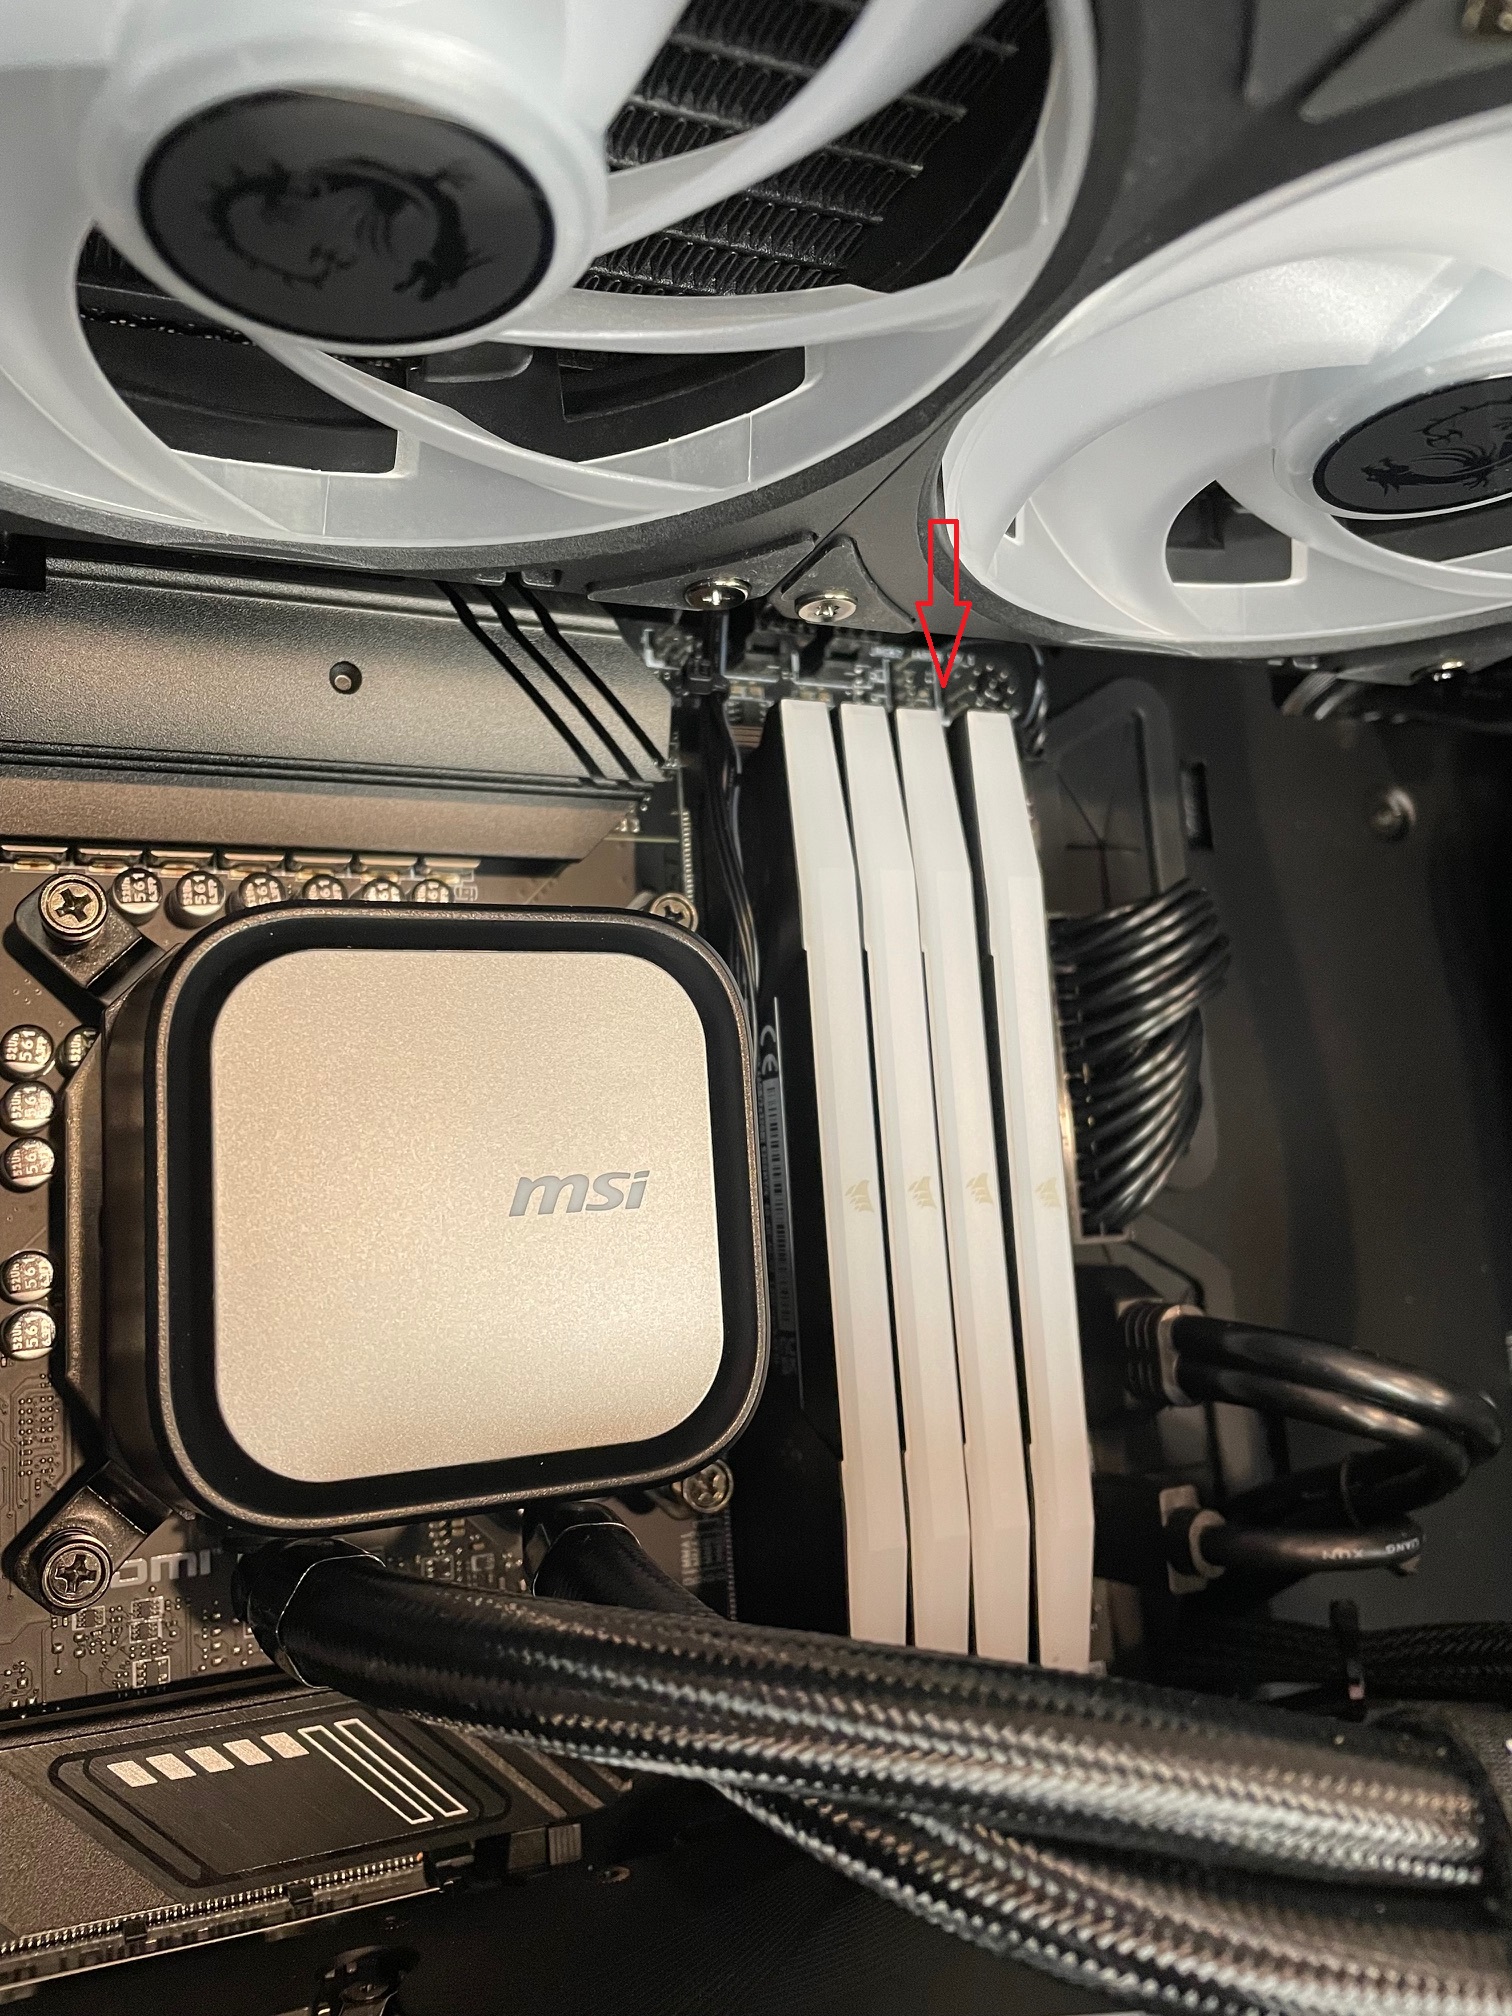
Shipping vibration is the most common culprit we see in the shop. A DIMM can pass every bench test before a system ships, then arrive with one module backed just far enough out of its slot to cause intermittent memory access faults. The module looks seated. The clips look closed. But the electrical contact is inconsistent, and the kernel notices before you do.
The Three Root Causes on a Fresh Build
Root Cause Engineering Breakdown
Loose DIMM from Transit
Vibration and handling during shipping can unseat a memory module even when the system was fully tested before boxing. Reseating requires powering down completely, releasing the DIMM retention clips, removing the module, and reinserting it firmly until both clips snap closed.
Driver Stack Not Yet Initialized
During the first few Windows boot cycles, chipset, storage, and GPU drivers are still being written and indexed. A kernel interrupt arriving before a driver is fully registered can trigger the same stop code with no underlying hardware fault at all.
XMP/EXPO Profile Instability
Borderline-stable XMP profiles can pass light workloads and fail only under interrupt-heavy conditions, which is exactly the scenario that produces this BSOD. Disabling XMP in the BIOS while diagnosing is a recommended early step.
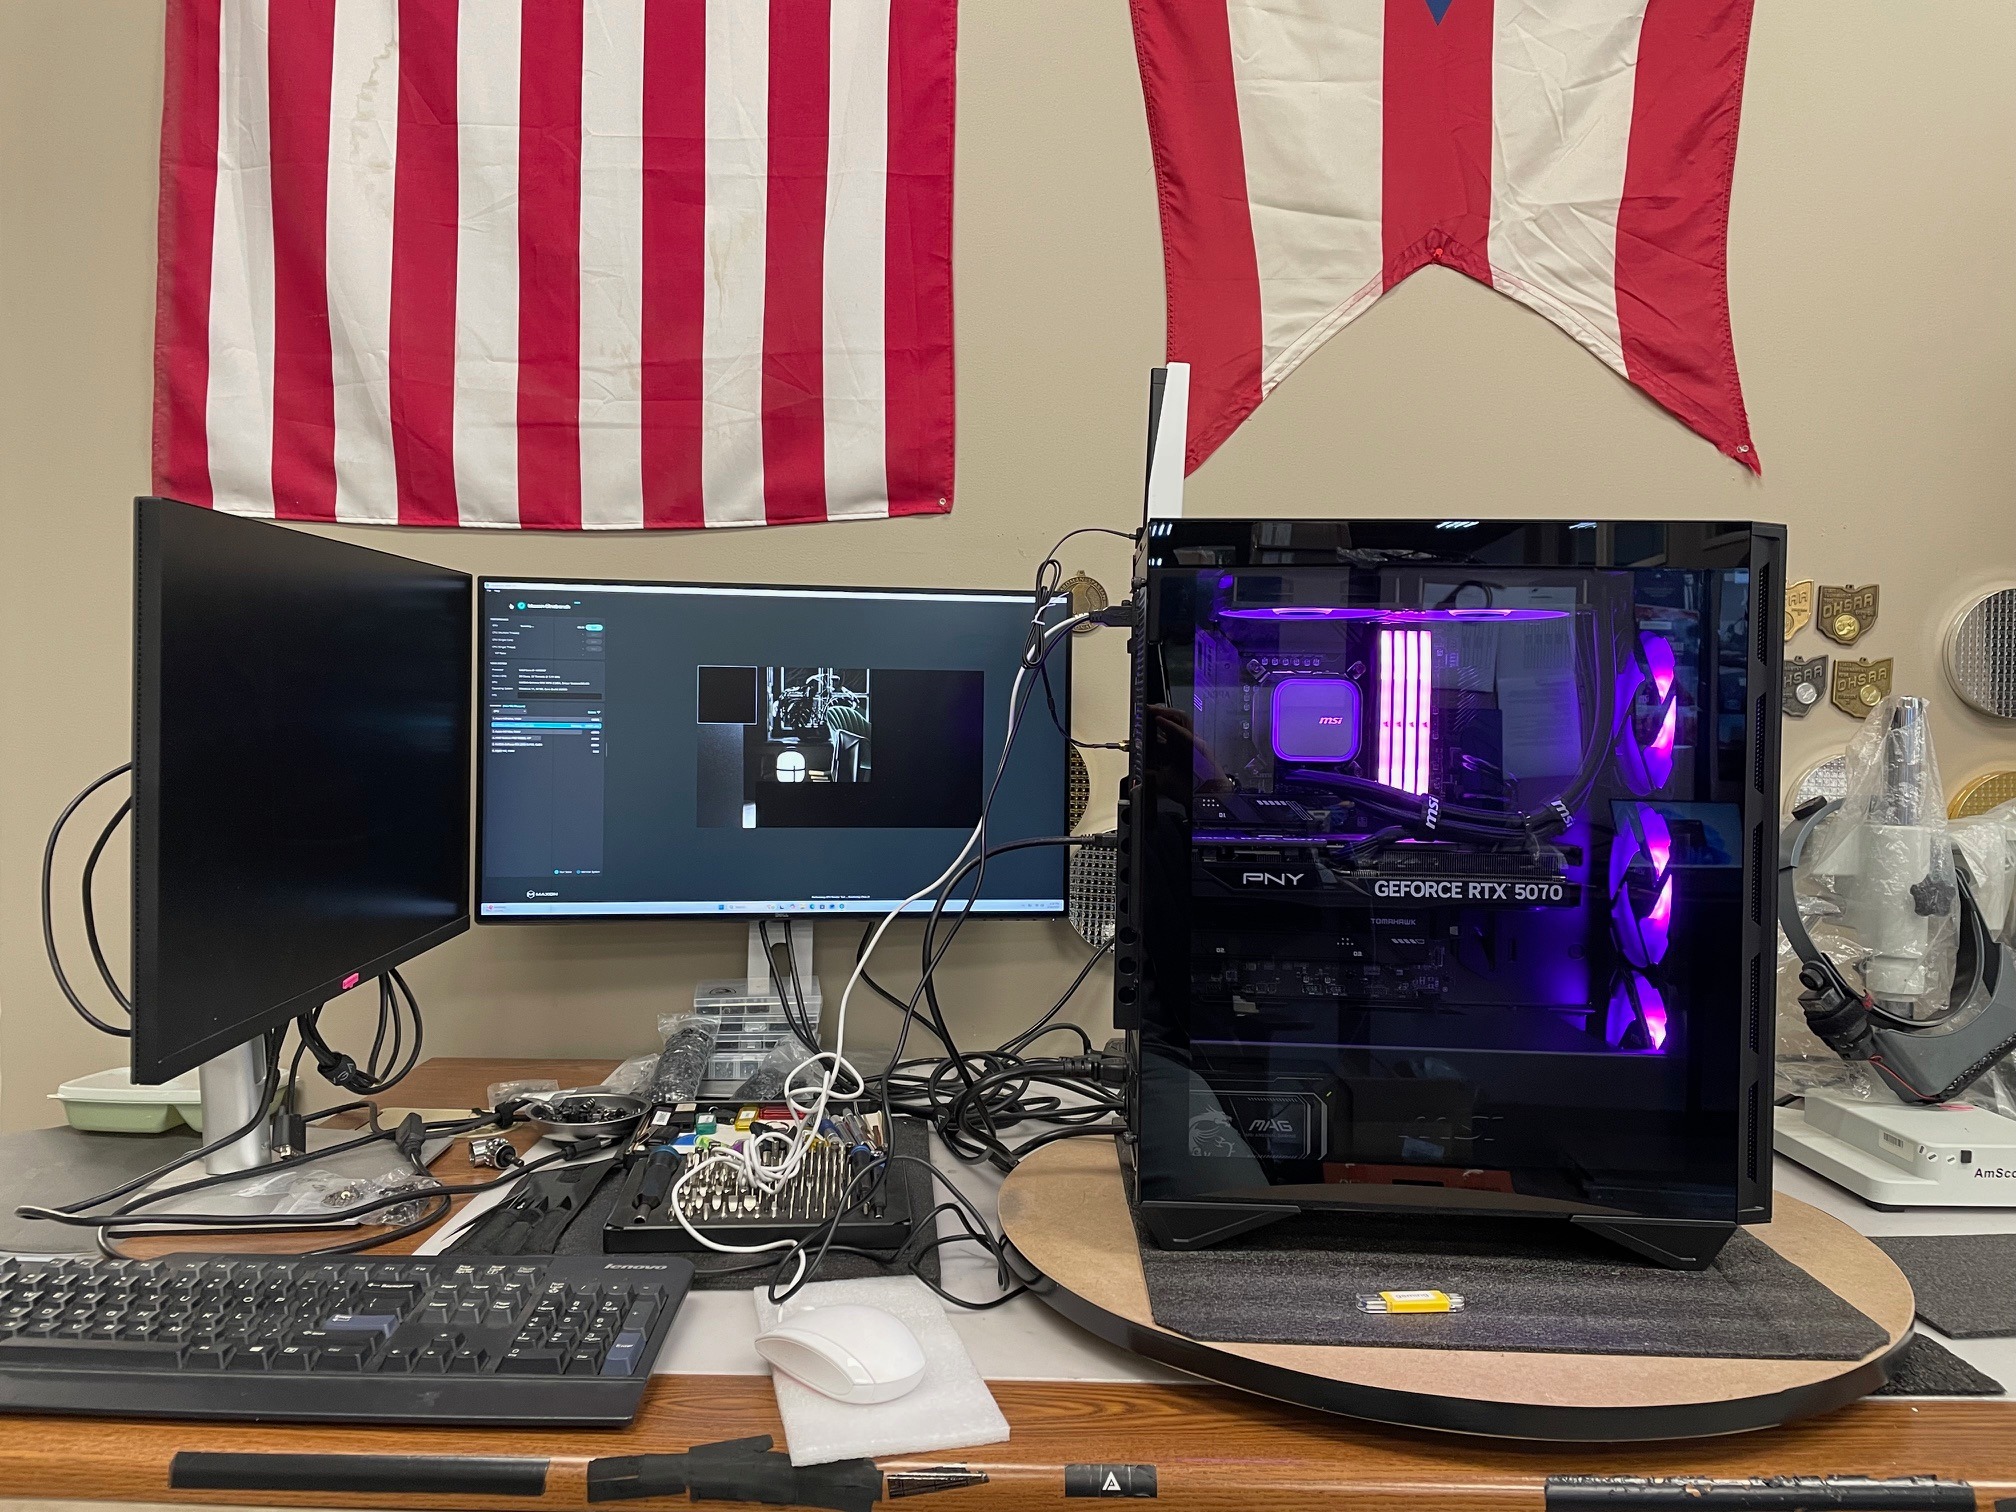
The specific build this bulletin covers is an i9-14900KF paired with an RTX 5070 on an MSI Gungnir 111R chassis. The i9-14900KF runs 24 cores across 8 Performance-cores and 16 Efficient-cores, with a max turbo of 6.0 GHz, which means the interrupt load during first boot is substantial. The RTX 5070 brings its own driver initialization sequence on top of that. For RTX 5070 i9-14900KF build BSOD troubleshooting, ruling out the RAM contact issue first saves significant time before touching drivers or BIOS settings.
Shipping Vibration and DIMM Displacement
Freight carriers subject packages to sustained vibration across hundreds or thousands of miles. That vibration transmits directly through foam and cardboard into the motherboard, and the DIMM retaining clips are not immune. Under repeated low-frequency oscillation or a single sharp impact, a clip can partially release, allowing the module to rise a fraction of a millimeter out of the slot.
That fraction of a millimeter is enough to cause problems. A partially seated DIMM will often pass a visual inspection because the module still sits mostly flush and the clip appears engaged. The electrical contacts, however, are no longer making full, consistent contact across all pins. The system may POST and even boot into Windows before the instability surfaces under memory access load.
Why the Failure Is Intermittent
Marginal pin contact behaves differently than a completely missing module. With a fully absent DIMM, the system typically refuses to POST at all. With a partially seated one, the system reads the SPD data, trains the memory, and proceeds. The failure appears later, when a memory-intensive operation forces access to a region of the module that relies on the compromised contacts. That is exactly the scenario that produces loose RAM from shipping causing BSOD conditions, including IRQL_NOT_LESS_OR_EQUAL.
Intermittent Boot Failures
Failures that resolve on the next power cycle, a hallmark of marginal pin contact, not a dead module.
BSODs Only Under Load
Crashes that appear under memory-intensive workloads but not at idle point to hardware contact, not a software conflict.
Varying Stop Codes Between Sessions
Stop codes that change between crashes point to memory rather than a specific driver, reseat before reinstalling anything.
Reseating RAM after shipping is a standard first diagnostic step for this reason. The fix costs nothing and takes under five minutes, and it resolves the issue in a meaningful share of new-build BSOD cases we see in the shop.
Step-by-Step Diagnosis for This Specific Build
Before touching any hardware, pull the minidump file. Open File Explorer and navigate to C:WindowsMinidump. Load the most recent .dmp file into BlueScreenView (NirSoft) or WinDbg. On this i9-14900KF build, the offending module will typically point to a memory address rather than a named driver, which is a strong signal that the problem is hardware-level, not a software conflict.
Hardware Steps
- Power down completely. Shut down, flip the PSU switch off, and hold the power button for three seconds to drain residual charge from the Gungnir 111R’s capacitors.
- Reseat all DIMMs. Release both retention clips on each slot, pull the module straight out, then press it firmly back in until both clips snap closed. On the MSI board paired with this build, the slots require more force than most builders expect.
- Clean the contacts if reseating alone does not hold. Wipe the gold edge connectors with a lint-free cloth dampened with 90%+ isopropyl alcohol. Follow with a short burst of compressed air into each slot before reinserting.
UEFI and Software Steps
- Disable XMP in UEFI and test at JEDEC defaults. XMP profiles that are borderline-stable can fail under interrupt-heavy conditions, producing this exact BSOD. Dropping to JEDEC speeds isolates whether the profile itself is the trigger. This is the core reason we recommend you disable XMP to fix IRQL_NOT_LESS_OR_EQUAL before drawing any other conclusions.
- Run Windows Memory Diagnostic. Press Win + R, type
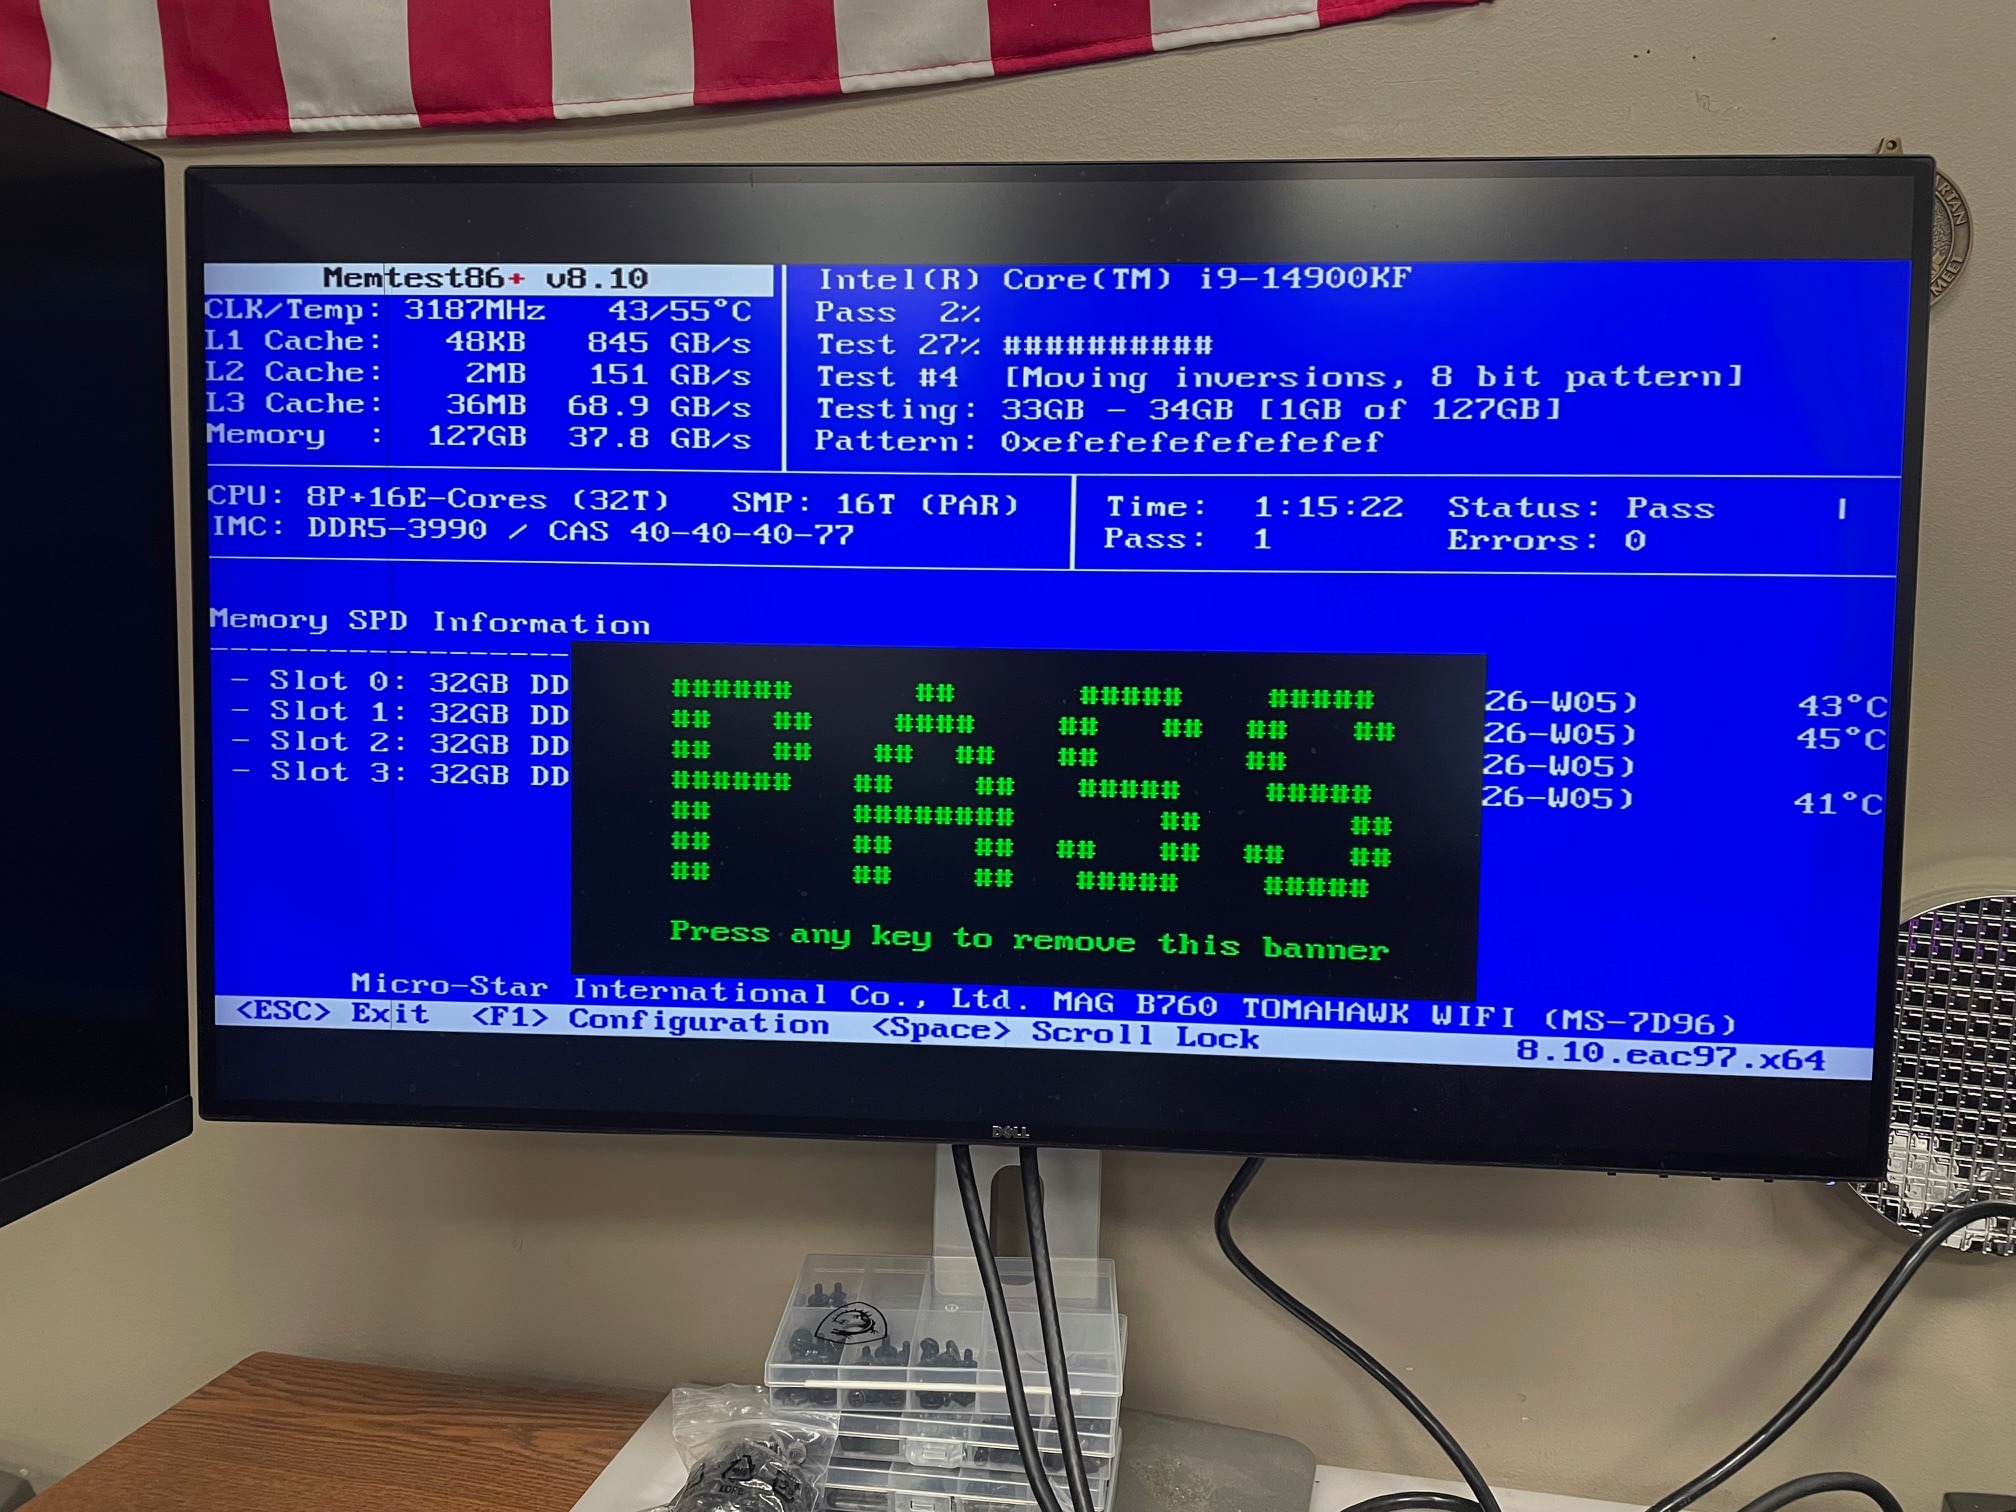
mdsched.exe, and schedule a restart. The built-in tool catches most single-bit errors on a first pass. - Test one stick at a time. If errors persist, seat only one DIMM in the primary slot and run the system through a full boot cycle. Rotate through each stick and each slot, noting whether the failure follows a specific module or a specific slot. A failure that follows the stick points to a damaged module; a failure that follows the slot points to the board.
Decision
For most readers: reseat, test at JEDEC, then re-enable XMP.
If the system runs clean at JEDEC defaults after reseating, re-enable XMP and monitor for 24 hours. A single loose DIMM from shipping, once properly seated, typically resolves the BSOD entirely without any component replacement. Only escalate to driver steps if MemTest86 returns clean and crashes persist.
Talk to an ArsenalPC build expert if you need guided support →
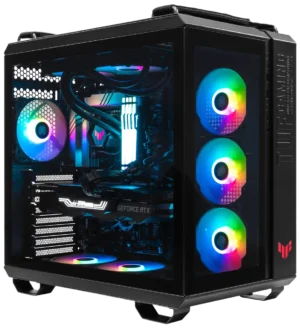
Reseat Procedure for the MSI Gungnir 111R
The MSI MPG Gungnir 111R is a mid-tower supporting ATX, Micro-ATX, and Mini-ITX boards. The full-ATX layout gives you generous DIMM slot access once the side panel is off, but you need to orient yourself correctly before reaching inside.
Removing the Tempered Glass Side Panel
The left side panel is 4mm tempered glass. There are no thumbscrews on the face of the panel. Two screws sit at the rear edge of the panel. Remove both, then slide the panel straight back about half an inch before lifting it away. Set it flat on a padded surface, glass side up. Do not lean it against the desk.
Before reaching inside, ground yourself. Touch the bare metal of the PSU shroud or the unpainted steel of the chassis frame. A wrist strap clipped to the chassis is better. The Gungnir 111R ships with four ARGB 120mm fans pre-installed, and the front intake array plus the rear exhaust fan will be the first things you see. Use the rear 120mm fan as your orientation anchor: the DIMM slots on an ATX board sit roughly centered in the chassis, just inboard of that fan.
Accessing and Reseating the DIMMs
Check the magnetic dust filter on the top vent before you start. If it has shifted during shipping, reseat it now so it does not fall into the build while you work. With the panel off and the chassis on a stable surface, locate the DIMM slots. Press the retention clips at both ends of each slot outward until they click open. Pull the module straight up with even pressure on both ends.
To learn how to reseat RAM in the MSI Gungnir 111R correctly, the key step is alignment before force. Line up the module’s notch with the slot key, then press down firmly and evenly until both retention clips snap closed on their own. A clip that does not snap fully closed means the module is not fully seated. Repeat for each stick, then replace the glass panel before powering on.
When It Is Not the RAM
If reseating both DIMMs and running a full JEDEC-speed pass in MemTest86 comes back clean, the loose DIMM is not your culprit. At that point, shift focus to the driver stack. IRQL_NOT_LESS_OR_EQUAL crashes are frequently triggered by a driver executing an illegal memory access along an active code path, which is why they surface under load: gaming, large downloads, heavy USB activity, VPN use, or waking from sleep rather than at idle.
Driver Escalation Order
GPU Driver, DDU Clean Install
Boot into Safe Mode, run Display Driver Uninstaller, then install the latest Game Ready driver for the RTX 5070. The RTX 5070 launched in March 2025 on Blackwell (GB205-300-A1) silicon, and those drivers are relatively new. Edge-case bugs in early Blackwell driver branches are a real possibility, and a clean install eliminates any corrupted remnant from a previous version.
First
Chipset and NIC Drivers
Pull the latest Intel chipset driver package and the LAN driver directly from MSI’s support page for your specific board. Inbox Windows drivers for newer chipsets are often several revisions behind.
Second
Windows Update Optional Drivers
Open Settings, go to Windows Update, then Advanced Options and Optional Updates. Manufacturer-supplied driver packages sometimes land here before they reach the OEM support pages.
Third
SFC and DISM System File Repair
Run sfc /scannow first, then DISM /Online /Cleanup-Image /RestoreHealth if SFC reports corruption. A damaged system file in a driver-adjacent path can produce the same stop code as a hardware fault.
Last Resort
Work through this list in order. Each step is reversible, and each one narrows the cause before you consider swapping hardware.
ArsenalPC Support: How We Handle New-Build BSODs
When a customer contacts us with an IRQL_NOT_LESS_OR_EQUAL BSOD on a new system, our first move is remote diagnosis, not a return label. We ask for the minidump file, the full stop code string, and a description of when the crash occurs. In most cases, that information tells us exactly where to look before a single box gets packed.
This approach works because we know the exact component stack in every build we ship. We selected the board, seated the DIMMs, and ran the burn-in. A mass-market OEM ships thousands of configurations and often cannot tell you which DIMM slot was populated at the factory. We can. That specificity cuts triage time significantly, and it means we can walk a customer through a targeted fix, like a DIMM reseat, rather than issuing a blanket hardware swap that may not solve anything.
Our Workflow
Remote Resolution Path
Diagnose and fix before any hardware ships back
Step 1, Remote triage: Customer sends minidump and symptom details. We identify the fault category within one support session. Step 2, Guided fix: If the diagnosis points to a physical cause like a loose DIMM, we walk the customer through the reseat procedure over phone or chat. Step 3, Confirmation: Customer runs MemTest86 or a stability session and reports back. We confirm the system is clean before closing the ticket.
Best for: customers with a loose DIMM, driver conflict, or XMP instability, the majority of new-build BSOD cases.
Physical Return Path
Only when remote steps confirm hardware replacement is necessary
Step 4, Physical return: Only initiated if remote steps fail and hardware replacement is confirmed necessary. Our team in Willoughby, Ohio has handled boutique PC builder shipping damage support cases long enough to recognize patterns that generic support scripts miss. A loose DIMM after transit is one of the most common, and most misdiagnosed, new-build issues we see.
Best for: confirmed hardware failures that cannot be resolved remotely, avoiding unnecessary downtime and component swaps for everyone else.
Our team operates out of Willoughby, Ohio, and has handled boutique PC builder shipping damage support cases long enough to recognize patterns that generic support scripts miss. A loose DIMM after transit is one of the most common, and most misdiagnosed, new-build issues we see. Catching it remotely saves the customer days of downtime and avoids unnecessary component swaps.
Need Help Diagnosing a BSOD on Your New PC?
ArsenalPC is based in Willoughby, Ohio with 27+ years of custom PC building experience. When a new build arrives with a BSOD, we start with remote diagnosis, not a return label. Send us your minidump file and we’ll identify the fault category in one support session. Every build we ship is one we configured, seated, and burned in ourselves, so we know exactly where to look.
- Phone: 866-277-3627 (Toll-Free) | 440-602-7090 (Local)
- Email: Contact Form
- Visit: 4711 E355 St, Willoughby, OH 44094
- Hours: Mon-Fri 10AM-6PM, Sat 11AM-3PM